Showing posts with label paper piecing. Show all posts

Sunday, June 2, 2019

10th Anniversary On The Road (Sturgis, SD)

In May 2009, we sold our house with most of our belongings in it and started traveling in our motorhome.  Hard to believe that we have been full-timing for 10 years!  Let's see if we can do another 10 years before we retire from the road.
Leaving Albuquerque May 2009
This seems to be the year for record-breaking weather throughout the US.  We have managed to be in a couple of the areas with higher than normal heat indexes during fall/winter in Florida and the cold, not to mention, very soggy spring in South Dakota.  We have been very lucky during our 10 years of traveling when it comes to weather.  No complaints about what we have experienced over the years.  

Just a couple of weeks ago, we woke to 5 inches of snow in Piedmont.  Not too bad considering the other areas in the Black Hills received over 10 inches.  Welcome Spring?
Dusty, of course, had to be convinced several times during the day that the snow was not gone by opening the door for him.  He would stand on the steps, look around, and stomp back in with his back twitching.  He looked very depressed at times.  Then he figured out he did not have to walk in snow if he jumped from the bottom step to the underside of the coach.  What a smarty cat! 😸
We moved to Sturgis a week ago.  The weather is starting to improve and the Sturgis RV Park is a little more sheltered from the wind, but we are still exposed to hail from severe thunderstorms.
This storm came down fast and furious with nickel-size hail.  It was deafening to have it hit directly on our roof and yes, we did end up with some damage to two of our vent covers and a side signal light.  I'm just glad we were not driving and the hail did not get bigger!
We have been getting flood alerts to stay away from the creeks during the storms.  A couple of days ago, the downpour developed several runoffs on the hill behind us. 
We are not in any danger of our coach being in high water, but it was amazing to see how fast the campground turned into one big muddy pond.

On a brighter note, we spent one sunny day driving through Spearfish Canyon.  A good time to visit some of the waterfalls in the area.  Our first stop was at the Roughlock Falls Nature Area with easy paved walking trails and plenty of viewing decks.
Roughlock Falls
There is some green vegetation, but the trees haven't quite filled out yet.  I bet the Fall colors are spectacular in the Canyon.
Roughlock Falls
 I loved the view looking in the other direction from the falls.  Look at those canyon walls and imagine trying to travel through here with a wagon and horses.
I had to have some photos of the wildlife.  We did not see a lot of activity.  Just a few deer near the road.  
Baltimore Oriole
No luck with sighting a Mountain Goat, but I did get a good kink in my neck.  Saw a mouse, sort of.  I did know that I had company in the bathroom until the field mouse ran to the door.   By the time I turned around, he was halfway under the door.  All I saw was a furry grey behind, a tail, and two back feet scrambling fast to squeeze under the door.
Dan spotted this feathered guy eating a berry in the tree.  I was hoping he would clean his beak for his photo op.  Oh well, the berry did match his feathers.
He did pose and did not look alarmed to see me walking closer to him.
Yes!  I am a pretty boy!  Did you get my good side?
The chipmunk wasn't skittish either.  He ran down the sidewalk in front of us.  I tried to get a photo of him running with his tail straight up, but he was too fast for me.
We played peek-a-boo in the grass until he decided sitting on a rock would be better to keep an eye on me while he munched some food.

We stopped at Spearfish Falls but decided not to walk down to the lower end of the falls.  The last stop was at the Bridal Veil Falls.  This one can be seen from the highway as you drive by, but it still makes for a nice stop.
Bridal Veil Falls
My fingers are crossed that the warm weather will hold out so we can enjoy more of the area.

On The Cutting Board
I had my own record-breaking moment this year.  I haven't worked on a single quilt project since we left Florida in February.  Well, I have been embroidering on quilt blocks, but no sewing, cutting, or quilting.  No New Projects!  That is the longest I have gone without quilting in over 20 years.  I'm trying to finish projects that I have started before starting others, but it doesn't seem to be working out too well.

I was stuck big time with the quilt blocks below.  The pinwheel blocks were driving me crazy, so I just put them aside where I could see them every morning and growl at them.  I could not get the points together or get the blocks sewed to the correct size which is 4.5 inches.  Talk about some wonky looking blocks!  I thought about sewing them by hand and just could not find enough energy to make and mark new pieces to sew together.  Finally, I decided to paper piece the block.  I made my own pattern in EQ7 since they did not have a pinwheel-on-point block.  It took me a couple of tries to figure out why the seams were not laying right.  Once I got the sequence correct, the blocks ironed flat.
Soooo much better!  I turned our snow day in Piedmont into my quilt day and set up 4 stations and managed to finish 20 of the 35 blocks needed for the quilt.  Plus, I got a few steps in walking from the bedroom to the living area.
I'm still working on my A to Zzz Snowman quilt.  Here is R for Reindeer....
and my favorite block - Q for Quilts.  I did not realize until I started working on this one that the word 'Quilt' was not included in the block's pattern.  
I'm tempted to add it in using letters from the other blocks.  I'll have to think about that one.

In the meantime, we better get the cats outdoors.  They know it is nice outside and are gathering at the door.
Happy Quilting!

Thursday, December 12, 2013

Mixed Signals (Sutherlin, OR)

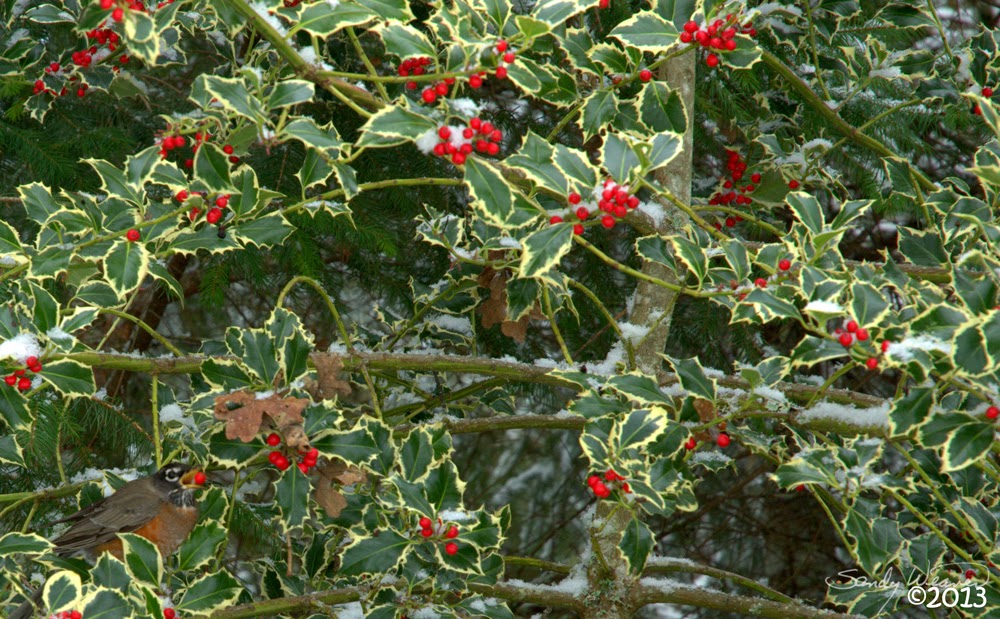
I always related the American Robin with spring time.  See a Robin...Spring is right around the corner.  Hmmm, doesn't seem to be working this time.  I am seeing a lot of Robins hanging around the park.  
They must be finding some good food because they are chubby little fellows.  The berries on the holly bush are almost gone.
caught red-handed or is the red-beaked?
Every time we go for a walk there seems to be more Robins than the last time.  Maybe they are here for a short time before moving farther south.
save some for me!
We are starting to warm up, but not to spring-like temperatures.  Wouldn't that be nice.  Sounds like our snow will be melting soon with warmer weather on the way.  I'm seeing small hints with clear roads and icicles everywhere.  It has been a long time since I have had icicles hanging from our home.
It was nice to have a winter wonderland for a little while.  Even though, it was hard to keep our motorhome warm. 
 I can say one good thing about a cold motorhome...our cats became very friendly during that time.  I know it was for body warmth, but I'm not picky!
Gorgeous day!  (Timber Valley SKP)
The funny part about the cats is their short memories.  They keep begging to go outside and 10 minutes after they beg to come back in.  Only Max has not been outside.  He goes as far as the door only to turn and run for a hiding spot.  "You're not going to make me go out there!"  Smart cat.
When is this cold stuff going away?!
On The Cutting Board
My scrap bag is down to large pieces of scraps and not much variety for me to keep working on the wonky log cabin blocks.  I need some smaller pieces so I'm working on another paper piece pattern.  This is called the tumble block with second design of stars.  This will use up some of the fat-quarters and larger scraps that have been taking up space.
I'm going to make two quilts this way.  The jungle theme (above) and the transportation theme below.  I started the jungle theme a couple of days ago until I tried to slice my own finger with the rotary cutter.  Not too deep, but, yea, that hurt.  I guess I should pay more attention to where my fingers are on the ruler.  I decided to take the next couple of days off from all the cutting I have been doing.
My finger is doing better, so I will start back up on paper piecing very soon.
Happy Quilting!

Sunday, November 27, 2011

Happy Scrappy!

or is it - Scrappy Happy?

All I know is that I have been working on this project for awhile, but the scraps seem to be growing....hmm

What to do with all of these scraps!  I hate throwing out scraps, but they are taking up too much space!  The  bags are multiplying!  It's time to use them up and get some storage space back.  So my mission this winter is to use up all of these scraps.

For some reason, most of my scraps are long strips so using this foundation pattern works well for using up all those scrappy strips.  It is a 6 1/2 inch block so the scraps can be pretty small.  Yes, I'm bad about saving the very small pieces.  I think after this quilt is finished, I will use a larger block size and get rid of the larger scraps.

I love using paper piecing.  No measuring or miscalculations!  Well, okay...sometimes I underestimate the size of fabric and end up short when I fold it over.  But that rarely happens now.  After a few of those mistakes, I double check and when in doubt - I look for a larger piece!  I've got plenty of them!
older pattern from Quiltmaker (sorry, I don't which issue)
I separated the scraps by colors.  Two colors per bag.  Yellows/oranges in one bag. Reds/purples in another.  Blues/greens in a third.  Whites/blacks in a fourth and centers for fussy cutting.  Oh yea, plenty of scraps to work with on this project!

I picked out a center and decided to start with the reds and purples.
All the fabric will be placed on the backside of the paper.  I placed the foundation paper face down on the light box* so I can see the pattern through the paper.  I place the center scrap face up and the second scrap face down on top of the center.  Just like sewing two pieces together except there is paper attached to them and the seams don't have to line up.

I make sure there is a little over 1/4 inch of fabric over the guide line I will be sewing on.  I pin parallel and away from the line using a pin with a flat flower head* for less bulk.

*I added links to a couple of my tools so you can see what I am talking about.
 I always shorten the length so the needle will punch more holes per inch in the paper.
Flip the paper over so the foundation pattern is facing up.  This is where the flower flat head pin comes in handy.  The paper lies almost flat.  Sew on the guide line between 1 and 2 spaces.

I like to sew over the lines to help anchor the thread in place.  Sometimes removing the paper pulls the threads loose.

For trimming the extra material, I use a ruler called "Add-A-Quarter"*.  It has a ridge measuring 1/4 inch.  I have two rulers for different lengths - 6 inch and 12 inch long.  I started with the smaller one and found out it doesn't work too well on larger foundation projects.  

There's a 1/8 inch add-on ruler for miniature foundation quilts, but I refuse to go that small just because I would have doubled my scrap bags!
 With the paper pattern face up.
 Fold the paper back along the sewing line.
 Give the paper a good crease.
 Slide the ruler's ridge up against the paper and over the material.  Keep it snug against the paper
 Trim away the extra fabric.
 Turn it over.  Take out the pin.
 Iron the second scrap flat.
All right!  2 down and only 15 more to go!  But it goes fast.  Often I will do 4 to 6 blocks at a time depending on the large selection of scraps.
This shows the fabric's seams.
 Now, you start to repeat from here.  Foundation faces down on the light box.  Place third scrap on top of center covering the guide line between 1 and 3.
 Pin in place.
 Double check to make sure there is enough overhanging for a 1/4 inch seam.  Make sure the scrap is long enough to cover both ends with 1/4 inch seam allowance.
 Foundation facing up for sewing.
 Trim the excess.
 Iron and there is the third scrap.
 It doesn't look so good now, but gets better as I keep adding the scraps.

 Okay, this one is done and now it needs to be trimmed down to the 6 1/2 inch square.

Back to the cutting board.  Using a regular ruler, I line it up to add in the seam allowance.  I trim paper and material together.
Showing the seam allowance
All excess paper and material trimmed away.  I have a block!
To remove the rest of the paper, I start with the outside and work my way in.  I weaken the paper by folding back on the seam and rubbing the crease with my thumb or the with the side of scissors.

I usually save all the blocks for TV time.  I can watch a favorite show and tear paper (and make a mess) at the same time - aren't I multi-talented?  LOL!
When I tear the paper, I stay close to the seam so I do not loosen the threads or pull them out.
Finished block!
Won't these blocks will make a bright and cheerful quilt for Project Linus?
Here are some more free foundation patterns at Quiltmaker.

Just a quick note:  We had a wonderful visit with our son Shaun.  I wish he could have stayed longer since he can't make it back for Christmas.

Well!  Back to sewing!  Happy Quilting All!

Popular Posts